Universal Brake Line Flaring Kit 🔩 – Automotive Tube Repair Tool
Universal Brake Line Flaring Kit 🔩 – Automotive Tube Repair Tool
BUNDLE & SAVE
Couldn't load pickup availability
Safe & Secure Checkout
256-bit SSL encryption
protects every order.
30-Day Guarantee
Love it or get a full refund.
No hassle.

Universal Brake Line Flaring Kit 🔩 – Automotive Tube Repair Tool
Rusted brake line? Flare it right where it sits.
This compact 3/16" (4.75 mm) flaring tool makes clean SAE 45° double flares under the car. Cut out the rotten section, flare the good ends, splice in new line and skip the shop bill.

Salt rots one stretch of line. So why replace all of it?
Corrosion usually eats one section, over the rear axle, along a frame rail or under a clip, while the rest of the line is still solid. Then the options get ugly:
- Replace the whole line. Drop the tank, snake new tube from front to back, lose the weekend.
- Use a bar-style flaring kit. Pull the line, clamp it in a vise and hope the flare comes out straight.
- Pay the shop. A quote for a single line often runs into the hundreds.
This tool gives you a better option: cut out only the bad section, flare the ends on the car and join in new line with union fittings.
Two steps to a proper double flare
A single flare can’t hold brake system pressure. A double flare folds the tube end back on itself, so the sealing face is twice as thick and far less likely to split. This tool forms it in two quick operations.
Built for the job under the car
Fits where a flaring bar won’t
The compact clamp head and short handle work between frame rails, tanks and suspension parts, with the line still in place.
The same stick-out every time
Thread in the positioning bolt, push the tube flush against it, clamp. That one step keeps flares centered instead of lopsided.
One punch, two operations
The double-ended punch does both steps. OP1 forms the bubble, then flip it and OP2 finishes the flare. Drive it with a 17 mm wrench until the hex seats against the tool.
Handle on, or clamped in a vise
Keep the handle on for leverage under the car. Unscrew it and clamp the head in a bench vise when you’re making new lines.
Hardened where it matters
The heat-treated alloy die and punch hold their shape flare after flare, and the included die lubricant lets the punch glide instead of dragging on the tube.
Everything in one case
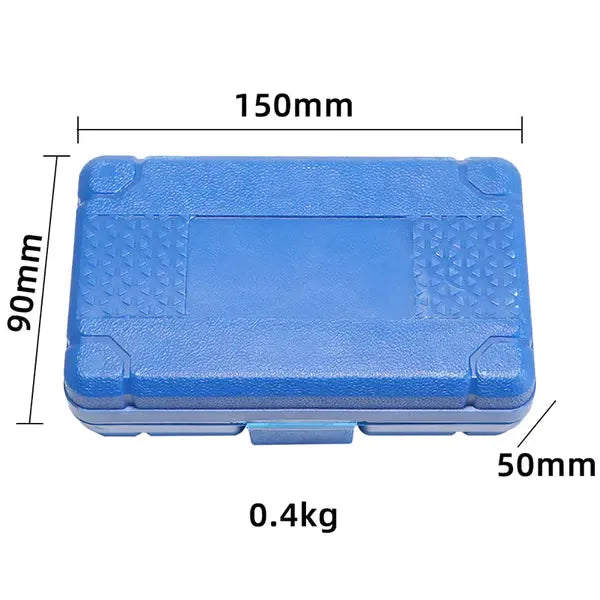
Tool, handle, positioning bolt, punch and lubricant store in a molded case that rides in the truck or the toolbox.

Will it work on your vehicle?
Thirty seconds of checking now saves a wasted weekend.
Made for
- 3/16" (4.75 mm) outside-diameter line
- SAE 45° double (inverted) flares, the trumpet-shaped flare on most US-built and many Asian vehicles
- Steel, copper-nickel (NiCopp, Cunifer) and copper tubing
- Brake and clutch lines, plus other 3/16" hydraulic or fuel lines
Not for
- DIN/ISO bubble flares, the mushroom-shaped flare on most European makes and some Asian models
- Stainless steel line, which is too hard for a hand-driven tool like this
- 1/4", 5/16" or any size other than 3/16"
Look at the end of your old line. Shaped like a tiny trumpet? That’s a double flare, and this is your tool. Rounded like a mushroom cap? That’s a bubble flare, and you’ll need a DIN/ISO flaring tool instead.

From cut line to finished flare
-
Prep the tube
Cut it square with a tubing cutter and deburr inside and out. Clean any coating or rust off where the clamp will grip. Slide the flare nut on now, because it can’t go on after the flare.
-
Set the stick-out
Loosen the two locking screws and feed the tube in. Thread in the positioning bolt and push the tube until it’s flush against it. Tighten both locking screws firmly and evenly, then remove the bolt.
-
Form the bubble (OP1)
Put a dab of lubricant on the OP1 end of the punch, thread it in and tighten with a 17 mm wrench until the hex seats. Back it out.
-
Finish the flare (OP2)
Flip the punch, lube the OP2 end and tighten until the hex seats again. That’s your 45° double flare.
-
Release and inspect
Loosen the locking screws and slide the tube out. A good flare is centered, smooth and free of cracks.
- Make one or two practice flares on a scrap piece first. 3/16" is the least forgiving size to flare.
- If the tube slips while you tighten the punch, clean the clamping area to bare metal and re-clamp tighter.
- Out of die lubricant? A drop of brake fluid works.
- You’ll also need 10 mm and 17 mm wrenches, a tubing cutter and a deburring tool (not included).
Brakes are safety-critical. After any line repair, bleed the system, have a helper press the pedal hard while you check every new joint for weeps, and test the brakes at low speed before driving normally. If you’re unsure about any step, have a qualified mechanic inspect the work.
The old way vs. this tool
Bar-style flaring kit
- Line has to come off the car
- Needs a bench vise
- Tube height gauged by hand
- Flares can walk off-center if the tube creeps
- Often means replacing the whole line
This tool
- Flares the line where it sits
- Handle for under-car work, vise optional
- Positioning bolt sets the height
- Threaded punch drives straight and stops when the hex seats
- Replace just the bad section
Who keeps one in the toolbox
- Salt-belt drivers
- Fix the rusted stretch over the axle without re-piping the whole truck.
- Restorers and project-car builders
- Flare custom lengths on the bench, then make the final connections on the car.
- Farm and fleet owners
- Repair work trucks and equipment where they’re parked.
- Mobile and shop mechanics
- Knock out on-car flares in tight spots without tying up the bench.

What’s in the case
- 3/16" flaring tool (clamp head with 2 locking screws)
- Removable handle
- Positioning bolt
- Double-ended OP1/OP2 punch
- Die lubricant
- Molded storage case
| Line size | 3/16" (4.75 mm) outside diameter |
|---|---|
| Flare type | SAE 45° double (inverted) |
| Line materials | Steel, copper-nickel, copper |
| Use | On the vehicle, or on the bench in a vise |
| Wrenches | 10 mm and 17 mm, not included |
| Package size | 5.1 × 4.1 × 2.1 in (13 × 10.5 × 5.3 cm) |
| Weight | About 1 lb (470 g) |

Questions
Can I really flare the line while it’s still on the car?
Yes, that’s what it’s built for. You need enough straight, clean tube for the clamp to grip and room to turn a 17 mm wrench. If space is tight, release a clip or two to free up some slack.
How do I know if my vehicle uses SAE double flares?
Check the end of your old line: trumpet-shaped means double flare, mushroom-shaped means DIN/ISO bubble flare. Most US-built cars and trucks and many Asian vehicles use double flares; most European makes use bubble flares.
Will it flare stainless steel line?
We don’t recommend it. Stainless is much harder than standard steel or copper-nickel and tends to crack in hand-driven tools like this one. Use a hydraulic flaring tool for stainless.
Does it work on copper-nickel (NiCopp) line?
Yes. Copper-nickel is soft and flares easily. Tighten the punch steadily, use the lubricant and check that each flare comes out centered.
Why do I need wrenches if it has a handle?
The handle holds the tool steady. A 17 mm wrench drives the punch and a 10 mm wrench sets the locking screws. Most home garages already have both.
The tube slipped in the clamp. What went wrong?
Usually coating, rust or oil where the clamp grips, or locking screws that aren’t tight enough. Clean that area to bare metal, reset the stick-out with the positioning bolt and tighten both screws firmly and evenly.
Can it make bubble flares or other sizes?
No. It does one job, 3/16" SAE 45° double flares, and it does that job on the car.

Brakes deserve a proper flare
Fix the bad section, keep the good line and keep the money a shop would have charged. Then put the case back in the toolbox, because salt will find another weak spot eventually.
Know someone who fixes their own cars? This is the tool they’ll be glad to own the day a brake line starts to weep.